
Since I had never done a yellow cake from scratch before, I went to a reliable source. Deb, over at Smitten Kitchen, has arguably to the most beautiful cooking blog you'll find http://smittenkitchen.com/. I used her recipe for "Best Yellow Layer Cake."
She called for two 9-inch round cake pans, but since I wanted to sandwich two slices of thin cake, I used three pans. She notes that this will yield two 9-inch round, 2-inch tall cake layers, and, in theory, 22 to 24 cupcakes, two 8-inch squares or a 9×13 single-layer cake. I only have experience with the three pan method, but I'm sure all of the above will work based on your cake needs.
What kind of stuff you need to make the darn cake:
4 cups plus 2 tablespoons cake flour (not self-rising)
2 teaspoons baking powder
1 1/2 teaspoons baking soda
1 teaspoon salt
2 sticks (1 cup) unsalted butter, softened
2 cups sugar
2 teaspoons pure vanilla extract
4 large eggs, at room temperature
2 cups buttermilk, well-shaken
1 heart cookie cutter
Preheat oven to 350°F. Butter three 9-inch round cake pans and line with circles of parchment paper, then butter parchment. (Alternately, you can use a cooking spray, either with just butter or butter and flour to speed this process up.)
Sift together flour, baking powder, baking soda, and salt in a medium bowl. In a large mixing bowl, beat butter and sugar in a large bowl with an electric mixer at medium speed until pale and fluffy, then beat in vanilla. Add eggs 1 at a time, beating well and scraping down the bowl after each addition. At low speed, beat in buttermilk until just combined (mixture will look curdled). Add flour mixture in three batches, mixing until each addition is just Incorporated.
Spread batter evenly in cake pan, then drop the pan on your counter several times to eliminate air bubbles, this step is actually more important than you think. If you skip it, you'll end up with a cake full of holes, more prone to breaking apart when you go to cut out your hearts. Bake until golden and a wooden pick inserted in center of cake comes out clean, 35 to 40 minutes. Cool in pan on a rack 10 minutes, then run a knife around edge of pan. Invert onto rack and discard parchment, then cool completely, about 1 hour.

After this is done, you have to make the filling. Please don't be scared of the shortening. It's in WAY more things than you even know about. Frostings, fillings, pie crusts and most things the are fluffy and sugary and defy gravity have some shortening in them. This comes from topsecretrecipes.com
Filling recipe:
2tsp very hot water
1/4 tsp salt (fine)
2 cups marshmallow cream (one 7 oz jar)
1/2 cup shortening
1/3 cup powdered sugar
1/2 tsp vanilla extract
Combine the salt with the hot water in a small bowl and stir until dissolved, let cool.
Combine this with the marshmallow cream, shortening, powdered sugar, and vanilla and beat well on high until light and fluffy. This is where you can take some liberties, also. I added at least another 1/4 cup of sugar because I wanted to be so sweet and as Little Debbie-like as possible.
Add the salt water solution to the rest of the filling and mix.
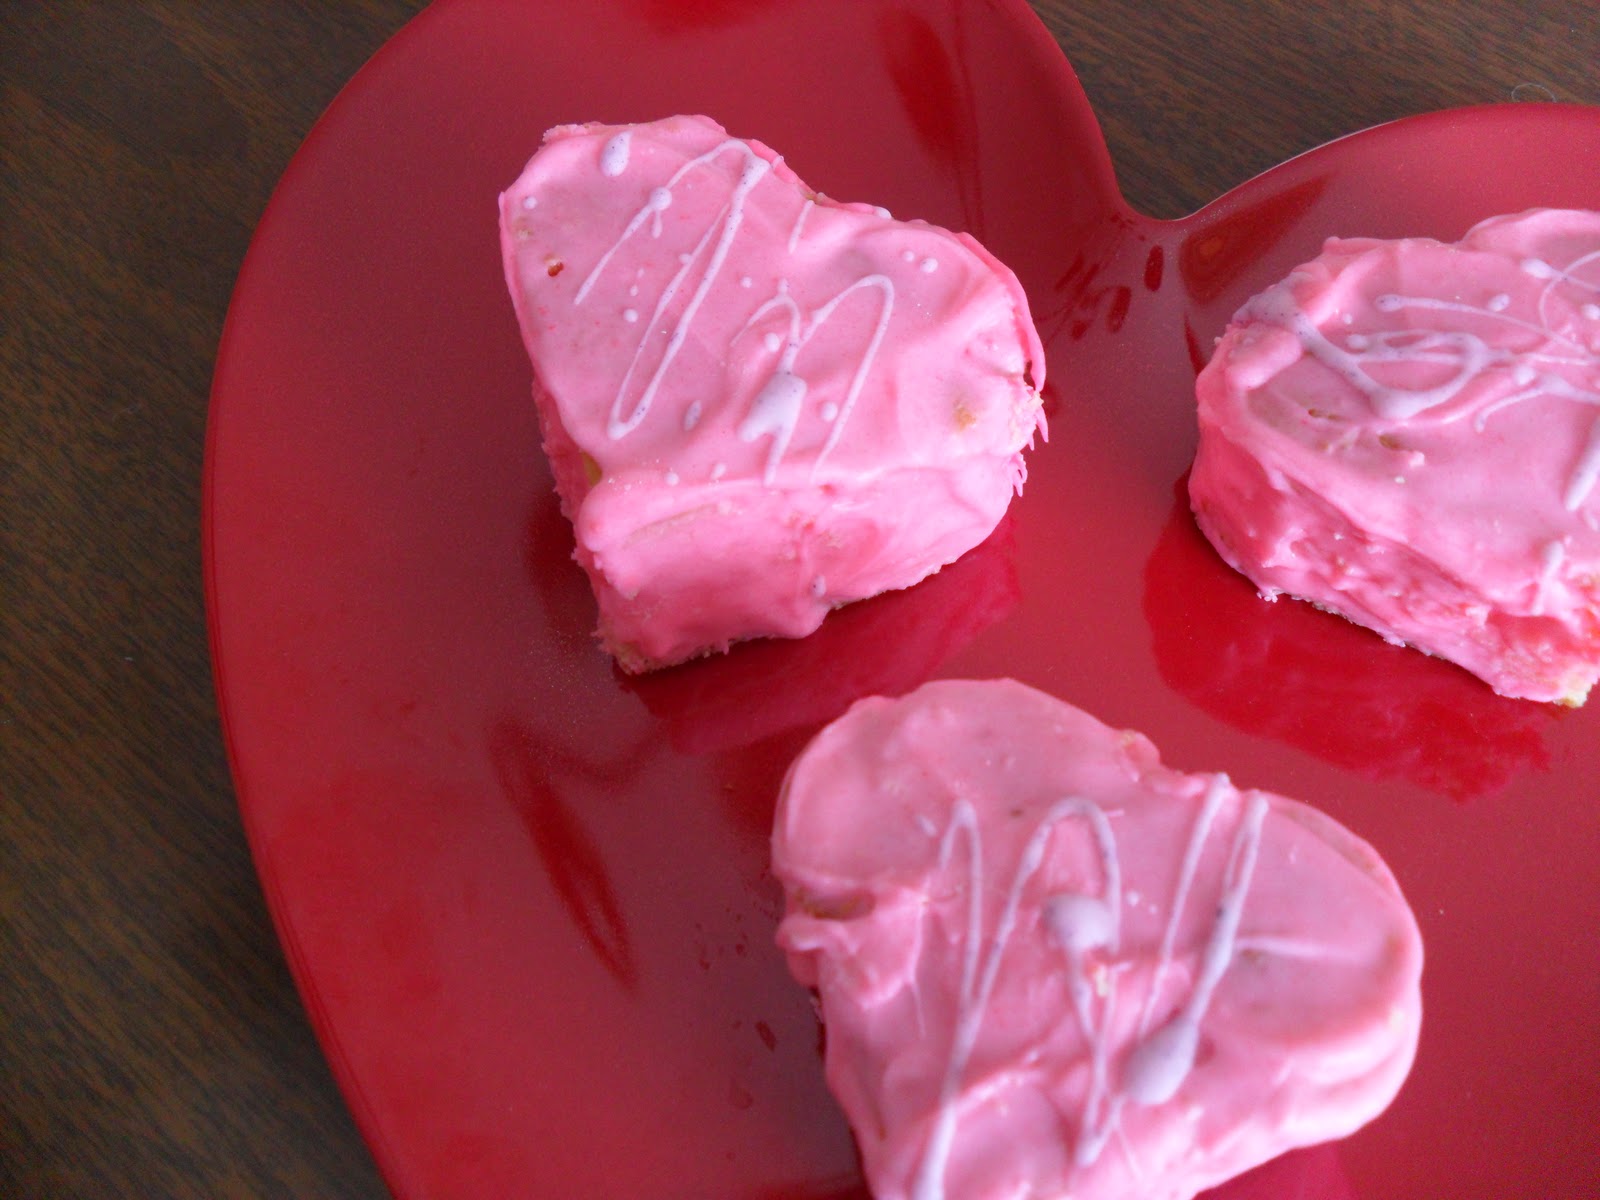
Next, I sawed each cake horizontally. So now, instead of three cakes, you have six. Take your heart cookie cutter and cut as many as you can get out of each cake. Spread a thin layer of the filling between two heart shapes and place in freezer for maybe 10 minutes.

For the coating:
One to two packages almond bark
Pink or red food coloring
Get your almond bark ready by chopping up into bits and place in microwave safe dish. Microwave for 30 seconds and then stir, repeating the process until velvety (maybe four times or less). Set a small bowl of this aside for drizzling later. Put a few drips of red or pink food coloring into the almond bark and stir. As you work on coating your cakes, the bark will harden, pop in the microwave for 20 seconds or so. I only used one package of almond bark, but I strongly recommend using two. That way you'll be able to dip your cool cakes in it and make a thicker coating. I just used a knife to spread, but ideally I would set them all out on a cooling rack and pour the bark over the top, spreading down the sides with a spatula. Drizzle with the white almond bark you set aside (I added a bit of purple to mine). Let cool on the counter or in the freezer to speed up the process. Enjoy with some milk, champagne, or your favorite 40 oz malt beverage from the gas station!
